Best Sniper in Call of Duty Black Ops 3
Introduction
v 1.37
Accolades return to Black Ops bigger than ever. Each level features ~16 challenges specific to that level which you must complete. Rewards are either XP or fabrication kits.
This guide will begin by outlining the mechanics of accolades, then proceed through each level in turn. The accolades are listed in (my) rough chronological order as they would be acquired on a playthrough, rather than the order listed on the game, since the whole guide will form a (light) walkthrough with an emphasis on the accolades.
The guide is designed to be used like a walkthrough, as a companion to a playthrough while the user hunts for accolades. Alternatively, it can be consulted for specific clarification on a single accolade. It is designed for a single player.
In the spirit of gaming as a whole, I advise players to complete the campaign at least once without consulting this guide, in order to avoid spoilers and prevent grinding for accolades detracting from the experience. You'll also pick up plenty of accolades on your own this way.
Points to remember:
- A description for each accolade can be found on the start menu during each mission. You can also use the mission select computer in the safehouse to view accolades.
- Accolades may be acquired on any difficulty. The easiest difficulty setting (recruit) is recommended in almost all cases.
- Accolades DO NOT have to be completed on a single play through. Once an accolade is complete, it is saved and does not have to be completed again. It is not even necessary to complete the checkpoint.
- For accolades that involve running totals (e.g. get 5 grenade kills), you must get the requisite amount in a single playthrough. In addition, any progress you make is saved only at each checkpoint. If you die, then the counter resets to whatever it was at the most recent checkpoint.
- You can check your progress towards accolades of this sort on the accolades menu during play.
- Accolades can be acquired in co-op, and it is occasionally preferable to do so. The rules for what counts are further obfuscated by having multiple people doing the same thing. Sometimes a player's individual actions count for everyone, sometimes just for themselves. It's entirely up to the player - if you have friends who also want to complete the accolade, then you might argue that co-op shares the burden (and is more fun). Equally, it multiplies the risk. In particular, certain game elements are made more difficult on co-op to compensate the larger number of players and this may interfere with accolades.
- If you miss the opportunity for an accolade, then you can kill yourself to go back to a previous checkpoint and start again. Cooking a frag in your hand or blowing up thermite on your feet is a quick way to do this.
- If you cannot suicide, or if you have already triggered a checkpoint, then there is a solution for the next time that you try. Instead of selecting a mission, choose to go through the missions as part of the campaign (i.e. click 'resume story' when you log into 'campaign').
When you do a mission as part of the campaign, it is divided into major and minor checkpoints. When you reach a major checkpoint, it will says 'progress saved' in the top right. However, these are not the only checkpoints in the mission - there are minor ones interspersed too. Whenever you die, you are transported back to the last minor checkpoint.
However, if you select the 'save and exit' option, then your progress is saved to the last major checkpoint. You may have noticed this if you played through the story, reached a point where you died a lot and quit (ostensibly saving your progress), only to resume at a checkpoint further back.
If you select single missions by choosing 'mission select', then you do not have the option to 'save and exit'. You will simply lose all of your progress.
As a result, if you play through a mission in true campaign mode, you have the option to quit and then reload. This is useful if a) you cannot suicide to retry (vehicle sections) or b) the window for the accolade extends over a long period, but there's a minor checkpoint in the middle.
That is, if you mess up a vehicle section, you just exit and then click on 'resume story' to come back at the checkpoint before the vehicle section starts. Or, if you mess up an accolade, but killing yourself doesn't transport you far enough back, you might have a chance with this method.
Of course, this does mean that you may have to go through lots of campaign missions to get to the one that you want. If you're doing a run through where you want to pick up all the accolades, it may be wise to do it this way instead of selecting each mission in turn.
- If you have trouble with any of the videos in the guide, then right-click on them and use the option to copy the URL of the video - you can then view it in a web browser. Steam and Youtube videos do not always mix!
All missions feature the 'Untouched', 'Score' and 'Got 'em' accolades. 'Untouched' means completing the entire mission without dying. This is clearly most easily done on recruit. Mission failures arising from other means (e.g. friendly fire) do not invalidate this accolade. If you die, you must click 'Restart mission' and try again.
The biggest dangers to your health are explosives and melee attacks. If you're close enough for enemies to melee, you're probably being too risky. As for explosives, you have some options in the Tac-Rig on your loadout. Sensory Buffer reduces explosive damage and the Repulsor actively repels explosives. More generally, the Emergency Reserve gives you a second chance and is strongly advised.
'Got 'em' requires you to find all the collectibles on a map. There is already an excellent guide on Steam to these, so there's no point in duplicating any info here. The style of the guide will be walkthrough-esque, so I'll point out when intel is in the area, but specific instructions can be found elsewhere. The idea is that you flip over to a video guide for the intel to pinpoint the exact location.
The score system has been greatly simplified since Black Ops 2. There is now no difficulty bonus, nor any bonus for having all accolades. Mostly, the system is simply 100 points for a human kill, 150 for a robot and a custom amount for other enemy types. That's it. Unlike Combat Immersion where there are bonuses, achieving the required score is simply about killing as many enemies as possible.
Accolade rewards are mixed. Some offer fabrication kits (and are necessary to complete in order to unlock everything); others just offer experience points. There is also a campaign decoration for completing all accolades.
I will operate under the assumption that players have the necessary weapons/abilities unlocked to fulfil the requirements. In particular, reaching level 20 so that you can bring all three cyber cores with you saves a lot of repeats. When I suggest a loadout, this is purely for the sake of bringing specific useful weapons for certain accolades; it is not mandatory or even necessary.
You are advised to read the entire section for a single level first in order to get a sense of where each accolade will be picked up and acquire some justification for the recommended loadout.
Please comment on the guide if there is anything here that is obviously incorrect or could be improved. I am particularly interested in alternative strategies for any of the accolades. If you would like additional clarification (e.g. more pictures or videos), then please let me know in the comments.
Finally, I do not pretend to be the only person with an accolades guide. If mine does not have what you are looking for, then feel free to consult Youtube.
Black Ops
Remarks:
- Suggested loadout involves the Haymaker (extended mag) , L-CAR 9 (the pistol is necessary for the final accolade) and frags. Repulsor Armour on the Tac-Rig is useful.
- These can all be done in one playthrough; although, some are a little awkward, so you'll be repeating a couple of specific sections several times which rules out 'Untouched' on your first attempt.
- Untouched is very easy since the enemies pose little threat.
Locate Minister Said
The mission begins in the control tower. After you pass under the plane wheels, check the desk on the left for [color=red]collectible 1[/color]. You then follow Hendricks to the camera room. Before you scan the cameras, check the room for [color=red]collectible 2[/color].
Go To the Interogation Room
Wildfire
: Set 9 enemies on fire within 7 seconds
Now things get loud. Proceed down a corridor and kill the three guards who enter. You'll emerge into a narrow room with vehicles and a gantry. Dotted around this area are numerous red barrels that will set proximate enemies on fire. Immolate 9 in 7 seconds for the accolade. The trick is to rush in aggressively so that all the enemies spawn, then quickly blow up as many tanks as possible.
Video note: There is no sound for this video.
Proceed through and you'll come to the interrogation area.
Quick on the Trigger: Kill all 3 guards in interrogation room before Hendricks does
Breach the observation room and wait for Hendricks's countdown. Rather than waiting for him to finish the count, start shooting as soon as you are able and quickly massacre the guards before he even enters. Note that the interrogator (no beret) does not count but tends to get caught in the crossfire anyway.
Grab [color=red]collectible 3[/color] from the observation room (included in the video).
Go to the Extraction Point
Once Khalil is rescued, you'll proceed through a set of double doors and engage some more enemies. The pathway bears right, through two archways, opening into a larger area. In this area, there's a walkway in the middle and a lift at the back.
Overburdened: Crush an enemy to death
To the left of the room you'll see some concrete tubes hanging from the ceiling (Fig. 1.1). Shoot these to drop them on anyone below. You'll need good timing - try moving into the room via different routes to change how the enemies move around the area and hence whether they move under the tubes. The checkpoint is just before this area, so you have as many retries as you want.

Turkey Shoot
: Kill 4 enemies in an elevator before they can exit
If you proceed into the room, Hendricks will mention the elevator. It contains four rather unfortunate guards. You need to massacre all four before they leave the lift to get the accolade.
Enter Taylor and friends. After some tense dialogue, you'll leave the hangar and Diaz will incapacitate some guards. Follow him up the 'stairs' and proceed through the window.
Toasty: Kill 4 enemies while they are swarmed by Fireflies
Once Diaz is on top of the plane, he'll unleash his fireflies (the white flies - Fig. 1.2). Kill any guards swarmed by these. Note that you can simply use your own fireflies (here or on other parts of the level), but this method works regardless.

: Destroy a VTOL using a grenade
Proceed into the next hangar and you'll be pinned down by heavy fire. Hendricks has the bright idea of shooting the missiles, but for this accolade, you'll want to dislodge them using a grenade (semtex is easier, but I specified frags because they're useful later).
Before you leave this room, check the inside of the structure on the left side for [color=red]collectible 4[/color].
Go to the Comms Room
Truck Stopper
: Destroy the 2 technicals guarding the bridge
Once Sarah has dealt with the technical, you'll become embroiled in a firefight. In the distance, you'll see a bridge (the subject of the game dialogue). Across the bridge will come two technicals (they are usually highlighted by objective markers to make it obvious - see video). Destroy these (grenades/regular gunfire is fine) for the accolade.
Your team elects to blow the bridge and proceed via an alternate route. Follow Hendricks into the indicated building and up the stairs.
Master of Shadows: Complete "The Dark Battle" without taking any damage
The Unseen Blade: Complete "The Dark Battle" using only melee attacks
Once the lights go out, kill all of the enemies inside the room with melee and without taking damage to get both accolades. Note that any hostiles killed by allies do not count, so you don't have to kill everyone in the room; you just have to ensure that you use melee only and that you take no damage from them.
Next you'll watch Taylor dispatch a VTOL single-handed and enjoy a brief firefight. Head up the stairs on the right and jump down into the 'alleyway'.
Cover Taylor
Force Multiplier
: Kill 5 robots with one explosion
Smoke goes down and five robots appear. KIll these (these five are too widely spaced for the accolade), then wait. A second wave of (densely massed) robots soon appears through the smoke, giving you an excellent opportunity for this accolade. Just cook and throw.
Once you''ve got the accolade, head inside. Grab [color=red]collectible 5[/color] from one of the shelves before you mount up.
Go to the Secondary Extraction Point
Clear Skies
: Shoot down 4 VTOLs with a mounted turret
Trail of Destruction: Destroy 12 ground vehicles with a mounted turret
These aren't too difficult if you keep an eye out for the VTOLs. The MG is outrageously powerful and enemy vehicles explode easily. Overheating on the gun takes a long time, so don't be afraid to spray wildly. Co-Op partners can help if you're really struggling.
Video note: There is no sound for this video.
Cover the Extraction Point
Whites of Their Eyes
: Defend the escape pod using only a pistol
For this final accolade, you need to defend your exfil using only a pistol. Switch to your L-Car (or other pistol but note that the annihilator doesn't work) and drop a couple of enemies. Then simply go prone behind the rocks and wait for the end of the mission. Do not use any of your other weapons.
New World
Remarks:
- Recommended loadout is LMG + Argus with EMPs and Traversal Enchancement on Tac-Rig.
- 'Untouched' is made much easier with Hijack abilities.
Multi-Tasker
: Kill 3 enemies while wall running
Fairly simple if you have the right equipment. Shotguns make wallrun kills easier, but any weapon will do. You need three singles and these can be done at any point in the mission.
: Kill 6 enemies through a wall or through cover
Self explanatory - use tactical mode to see enemies in cover, or just deliberately move so that objects obscure your shots.
: Kill 3 enemies with thrown back grenades
Just wait for enemies to throw them and toss them back. This is three separate kills, but this accolade can even be accomplished with a single grenade if you're lucky. Best done in the first section (Diaz).
Go to Suspected Terrorist Hideout
Inferno
: Light 3 enemies on fire at the same time 3 times
You either need to blow red containers to immolate three enemies three times or you can use thermite. Be clear that it's three sets of three which is tough. I'll suggest some barrel locations or you can use thermite at your own discretion.
There's a couple of barrels in the very first section, but it's hard to get three to cluster around, so don't worry about trying for it here. After you go up the stairs, there's another group of enemies with a green horizontal walkway high up, and, below it, some crates and drums with another explosive on it - this should be number one.
After Diaz mentions your enhanced mobility, you'll engage in another firefight. Follow the video for number 2.
Moving inside the warehouse, you have another great opportunity for number three. There's a couple of barrels here that work well (see videos).
Make 'em Count
: Kill 3 enemies with one explosion 3 times
This follows along similar lines, though you have much more agency. Just wait for clusters and dash in with explosives. There are lots of opportunities, so don't be too concerned if you only get one on the Diaz section. Note that you can also use 'Concussive Wave' cyber core power to get these.
After you've cleared the warehouse, either take control of a Talon or proceed on foot to another warehouse. There are opportunities here for inferno if you shoot the vats. PIck up [color=red]collectible 1[/color] shortly after entering. Clear the place out and blow the generator.
Locate the Terrorists' Command Centre
Turn the Guns on 'Em!
: Kill 6 enemies using a hijacked turret
The next warehouse features three turrets. Take control of them ('Remote Hijack') and gun down enemies.
Once the enemies are cleared, go through another door and Diaz's section ends. Then the scene changes to the chase.
Pursue the Suspect
This section chasing the suspect is referred to as "The Chase". All three of the following accolades can be completed within it.
Conservationist: Complete "The Chase" without reloading
Either take a weapon with a large enough ammo capacity that you won't have to reload (LMG), or use melee on the robots and cyber core on the Talons (or even just run through). Note that you still have to fire a shot, even if you intend not to use your weapons, just to tell the game that you don't intend to reload (notice in the video below that I fire my gun before the section ends to ensure that I get this accolade). The accolade will drop when during the cutscenes with Sarah at the end.
: Complete "The Chase" without de-rezing any civilians
This is misleading. You can de-rez civilians (they go blue and phase out) not only by shooting them, but also by running through them. When the groups of civilians panic, stay out of their way so that they don't try to pass through you. Likewise, watch your fire. The accolade will drop when during the cutscenes with Sarah at the end.
Video note: You can just about see the accolades drop at the end of the video, but I foolishly skipped the cutscene too quickly. I can verify that this video does show a legitimate run of both conservationist and discretion (and parkour, though I already had it).
Parkour: Wall run over a train while it is passing
Once you enter the station proper, Sarah will prompt you to use the billboard to get over the maglev train. Stick to the right and wallrun along the pink billboard as the train passes below.
Locate the Explosives
Spike-cicle
: Kill an enemy with an icicle
The scene changes to Maretti. As soon as you have control turn about 60 degrees to your left and look up for the icicles. Shoot them and they should drop on the group closest to you.
Pick up [color=red]collectible 2[/color] by going up the stairs to the left.
Caught 'em Sleeping: Kill 6 robots while they are disabled by EMP grenades
Once you've cleared the enemies in the room, a large group of robots appears at the exit. EMP them and set to work. There will be plenty of robots from this point on, so use your EMPs and get kills to complete this accolade. You can also use the 'Ravage Core' ability (equip the 'Control' core and get close to robots - you'll see a prompt) since the cores function as EMPs
Proceed through a couple more areas full of enemies. You'll do a section in smoke and then come to a much larger maintenance area (Maretti requests fire on bots moving a railcar). Drop into the 'pit' section and pick up [color=red]collectible 3[/color]. Then finish up Maretti's section, completing any outstanding accolades up to this point.
Locate the Explosives (pt. 2)
Stopping Power
: Kill 8 robots on the train with a shotgun without reloading
The Argus is the best bet here (extended mags makes your life easier too). Aim centre-mass rather than at the head.
Now that you're on the train, pick up [color=red]collectible 4[/color] from the bar and clear the first carriage. You'll move through into another where a robot drops through a glass panel in the roof. When this carriage is clear, head up the stairs on the right onto the second floor and grab [color=red]collectible 5[/color] from one of the seats.
You soon end up on top of the train; fight your way across, drop down, then jump back up on. At this point, Taylor will warn you about running out of time. You'll drop down for a second time into a pair of bots. There's an ammo crate here and another pair of bots.
Fast Learner: Kill 5 robots in under 2 seconds using Cyber Core abilities
You'll now see a closed carriage with a large number of robots (Fig. 2.1). 'Concussive Wave'/'Unstoppable Force' are good choices here; 'Immolation might work if you can cluster them closely together. Run to the far end first to spawn everyone, then unleash hell. Note that you can also use your rapid melee strikes to quickly follow up on any that you miss.
In Darkness
Remarks:
- Recommended loadout is Drakon + shotgun.
- This is one of the easier levels to acquire all accolades, though you will have to make separate attemptes for specific accolades.
- 'Untouched' is only an issue if you rush some of the larger engagements.
- The score accolade is a little tight, so be aggressive and thorough.
Neutralise the 54i Combatants
Commandeered
: Kill 20 enemies using a technical truck turret
Matched Firepower: Kill a Warlord using a technical truck turret
Rush to the technical and turn its gun on the unfortunate 54i. Kill the Warlord with it for the second accolade. You probably won't get the full 20, but there are more technicals later on. Note that enemies have a habit of rushing towards you, out of range of the technical, which can make it more difficult - it may help to stun large numbers of enemies first, before you rush to the turret.
: Kill a Warlord using only a pistol
You have to kill the Warlord using only a pistol - the L-CAR probably packs the best DPS, so just unload it into his head. Some people say that the annihilator works, but didn't for me.
Blown Away
: Kill a Warlord with an explosive barrel
Experiment with dealing damage to the warlord until he is on low health, then lure him to a barrel and blow it. This is tricky and frustrating because Hendricks makes things unpredictable. As per the video, five or six Drakon shots to the head is about right.
Fire for Effect can be done here, but there is a better spot further on, so don't worry too much. Once everyone is dead, grab [color=red]collectible 1[/color] from one of the buildings, then proceed up into the wind.
Go to the Docks
No prisoners
: Let no 54i combatants escape from the power generator building
From Nowhere: Kill 5 enemies over 150ft away in 3 seconds
After your foray into the wind, you come to a dilapidated building and hear Kane talk about a drone strike. Look over in the direction of the waypoint marker and you'll see a small number of enemies at the power station (Fig. 3.1). When the strike fails, they flee - shoot them before they can escape.

Note that 'No Prisoners' seems to be glitched - as long as you do some damage to them, a wave comes along and finishes them off which counts. If you manage to make all five kills quickly enough, you should pick up 'From Nowhere' as well.
Take a brief dip in the water, then emerge into another firefight. There is a technical here if you're missing turret kills (there's a third section further on, so don't worry if you haven't got close to 20). [color=red]Collectible 2[/color] is round the outside of the building, on the opposite side to the docks. To find it, from the water, instead of going onto dry land, follow it around to the right.
Clear the enemies off of the boat and prepare for breach.
Breach and Clear: Headshot 3 enemies during a door breach
You have to be quick, because Hendricks likes to steal them!
Go to the 54i Communications Hub
Enjoy the underwater interlude and don't forget to pick up [color=red]collectible 3[/color].
Fire for Effect: Kill 5 targets with a single micro-missile launcher volley
When you emerge on dry land and proceed to the surface, you'll see a shooting gallery of targets. Line up five and unleash pain.
Target Variety
: Kill an enemy robot and a human enemy without reloading
If it hasn't happened yet, kill a human and a robot without reloading. As the video shows, if you do 'Fire for Effect' as above, then it will complete automatically.
Head inside the building and enjoy another firefight. You can find [color=red]collectible 4[/color] at the far end in a side room on the ground floor. Hendricks will announce riot shielders.
Push the Line: Take out a riot shield phalanx using only melee attacks
Expert Flanker: Headshot 3 riot shield enemies
These are unfortunately mutually exclusive. The first two riot shielders don't seem to count as a phalanx, so you can kill them as you will. When you see the four coming down the next corridor, use your camo to sneak up behind, then chain your melee strikes to devastate them. For the second accolade, perform a similar process, except with headshots.
Go to the 54i Secondary Comms Relay
Kane will bail you out from a Warlord in the cutscene. Once you've shown your gratitude, jump out of the hole in wall and follow the waypoint markers. You have a choice of two accolades here. [color=red]Collectible 5[/color] can also be found here, but is not easily explained (use a video guide).
You'll emerge into a room missing most of its floor and glimpse, in the distance, patrolling robots inside another building. If you don't have 'From Nowhere' yet, you can pick up this accolade by taking out five enemies with the missile launcher (Fig. 3.2). Just ensure that you move as far back as possible.
: Kill 4 powered down robots in the Comms Relay before they activate
Without shooting, simply rush the bulding ahead, jump through the window and bear right. You'll see some robot housings on the wall with robots still inside. Shotgun the robots before they have a chance to power up.
Secure the Black Station
Once you've regrouped with Kane, you'll be presented with some zipline opportunities. Take either one and descend into the urban jungle.
Blast Zone: Kill 2 RPG enemies in under 1 second
Two RPG enemies can be seen in the buildings at the back (Fig. 3.3), high up in the windows. Either pull off some seriously quick shooting or use your cybercore powers (or the missile launcher). Note that you'll want to deal with these quickly, otherwise Kane/Hendricks will do the honours.

If you still need technical kills, there are several here (Fig. 3.4). Once the enemies are cleared away, follow Hendricks through the door. A discussion of debris will ensue; follow your team up the stairs into a new room and find [color=red]collectible 6[/color] on a desk to the left.

Provocation Part 1
Remarks:
- No specific recommended gear. A shotgun is useful for speeding up engagements and a thermal sniper can help with the final section. Also make sure that you have a class with a pistol of some description.
- 'Untouched' will require a bit of patience because the number of enemies is large.
- This guide is split into two parts.
Get to Cloud Mountain
Begin your day with a leisurely stroll through the marketplace. Bring a shotgun to deal with the 54i though. In fact, while you're there, pick up [color=red]collectibles 1&2[/color]. You'll then be warned of an enemy turret.
Give 'em All Nine: Use a turret to kill 8 enemies
Hijack the turret (Fig. 4.1) and kill eight enemies. This is easier if you rush through and then kill all of the retreating enemies you just passed; but there are turrets further on if things don't pan out.

Fight your way through the next group of enemies and you'll come to another open area akin to the first, complete with turret (if you need more kills) and RPG overwatch (Fig. 4.2). Shoot the solder with the RPG to blow up the tower - this handily counts towards a much later accolade. Check one of the buildings close to the ditch for [color=red]collectible 3[/color].
Next up is an mess of containers with 54i, robots and Talons. You can potentially get the Skeets accolade here, but there are better spots. Fight your way around to the other side, grabbing [color=red]collectible 4[/color] as you go. You'll see the door, through which you are supposed to proceed, closing - resist the temptation to kill the enemies (Fig. 4.3) you can see behind it!

Once the door shuts, a Warlord crashes your party, but is dropped easily. Two friendly robots will now open the door. Have your 'Remote Hijack' ready to go.
Bigger than You: Kill 8 enemies using a P.A.W.W.S.
Rush forwards (with the hijack going) on ground level, around the crates, to a group of rusted barrels. Take cover here and complete the hijack. Once it's done, rapidly destroy the enemies with the P.A.W.W.S.. I have had trouble at this section finding enough enemies, which is why I advocate leaving those soldiers alive when you first see them through the gate (they get shot, but it distracts your allies' fire. If you can't get enough, shoot allies in the P.A.W.W.S. to reset and try again.
Locate the 54i Servers
The Pointy End
: Kill an enemy with a stalactite
Enter the building in front of you and look up. Now you just have to wait for an enemy to pass beneath and shoot the stalactite. This is the only one that works, and if you have destroyed it with overzealous P.A.W.W.S. fire, you will have to restart the major checkpoint.
Fight your way through this building (made easier by hacking the drones) and head outside. Some Talons will appear. Skeets : Using a gun, destroy 3 Talons without missing a shot
Note that if you shoot one while they cluster and it explodes, destroying another, it still only counts as one, so you'll want to wait for them to disperse. Their movement follows a pattern of jerks, then a brief stationary period. You can also sometimes pick this one up on the vehicle section at the end.
Move back inside and check the display cases for [color=red]collectible 5[/color]. More Talons will appear as you leave on the opposite side and Hendricks will exclaim about the enemies on the walkways below. Clear out enemies as necessary and head to the top of the stairs.
: Use one grenade to destroy 3 or more robots
A large, dense group of robots appears here, just in front of two turrets. They are perfect for a cheeky nade.
Destroy the turrets and move into the server room.
Protect Hendricks
Repelled
: Kill all of the enemies headed for the server room while they are still on zip-lines
As soon as the action starts, make your way up the stairs to the second floor and out onto the balcony. A VTOL will appear and jettison two lines towards you along which enemies will travel. Kill them all before they land for the accolade. You have to be quick on the trigger and aim for the head - this is much easier in Co-op. The Drakon also works well because it is a one shot kill.
Provocation Part 2
After mounting a successful defence, you'll end up on the Super Trees. Amongst them is [color=red]collectible 6[/color].
Air Superiority: Destroy an enemy Wraith
Hijack a Talon and use it to shoot down the Wraith. Or, just use your own weapons.
Action Hero
: Kill 3 enemies while on a zip-line
You can travel repeatedly back and forth on the ziplines. Keep trying until you get the requisite number of kills. Note that you need a pistol to be able to fire while ziplining. There is a mobile armoury at the start of the Super Trees, so have a pistol class ready (or use the 'Field Ops Kit').
Clean Sweep
: Kill all enemy soldier on the Super Trees
You have to kill all enemies on the Super Trees. This turns out to be very awkward because enemies take a long time to spawn, the area covered is quite large and certain enemies play dead. Make sure that you check all the corpses - there always seem to be some 54i who are wounded but not dead (Fig. 4.3). Keep circling around for several minutes, even if you're sure that the place is clear, enemies do like to pop up long after the fight has started. Keep your fireflies permanently scouting for hostiles. The accolade only drops after you advance to the next checkpoint, so you want to be absolutely sure before you do so.
Secure the Dock
You'll end up underwater (again). Somewhat handily, four enemies will appear on the bank.
Up Periscope: Kill 4 enemies while underwater
You must be submerged - use tactical mode to see your targets (Fig. 4.4).

Board the Air Boat:
Trick Shooting
: Destroy 6 Talons in under 2 seconds
There is one particular section, early on, just after Hendricks says "Go left, go left", where large numbers of Talons fly at you - spray with the MG and their high density should cause mass casualties. If you miss them on the first pass, they do come again over your right shoulder; however, they seem to be harder to hit in that configuration.
Wreckage
: Destroy 5 guard towers
Vehicular Slaughter: Destroy 6 enemy trucks
These are fairly self explanatory. You're not paying for the ammunition, so go crazy. Trucks tend to spawn at the bases of towers and on the bridge. I have shown them as snapshots along the journey with towers highlighted in red and trucks in blue.
Recall also that we destroyed a tower early in the mission. It is unclear to me whether that was intentionally part of the accolade, or just a happy accident. But it is very useful, because there is some confusion about which towers actually count or whether some count double. Other videos make a variety of claims on the issue. At the risk of sounding glib, if you hit everything that I list in this guide, you'll be fine.
The first two trucks are at the base of the first tower - make sure you turn to the right and get the third truck as well.
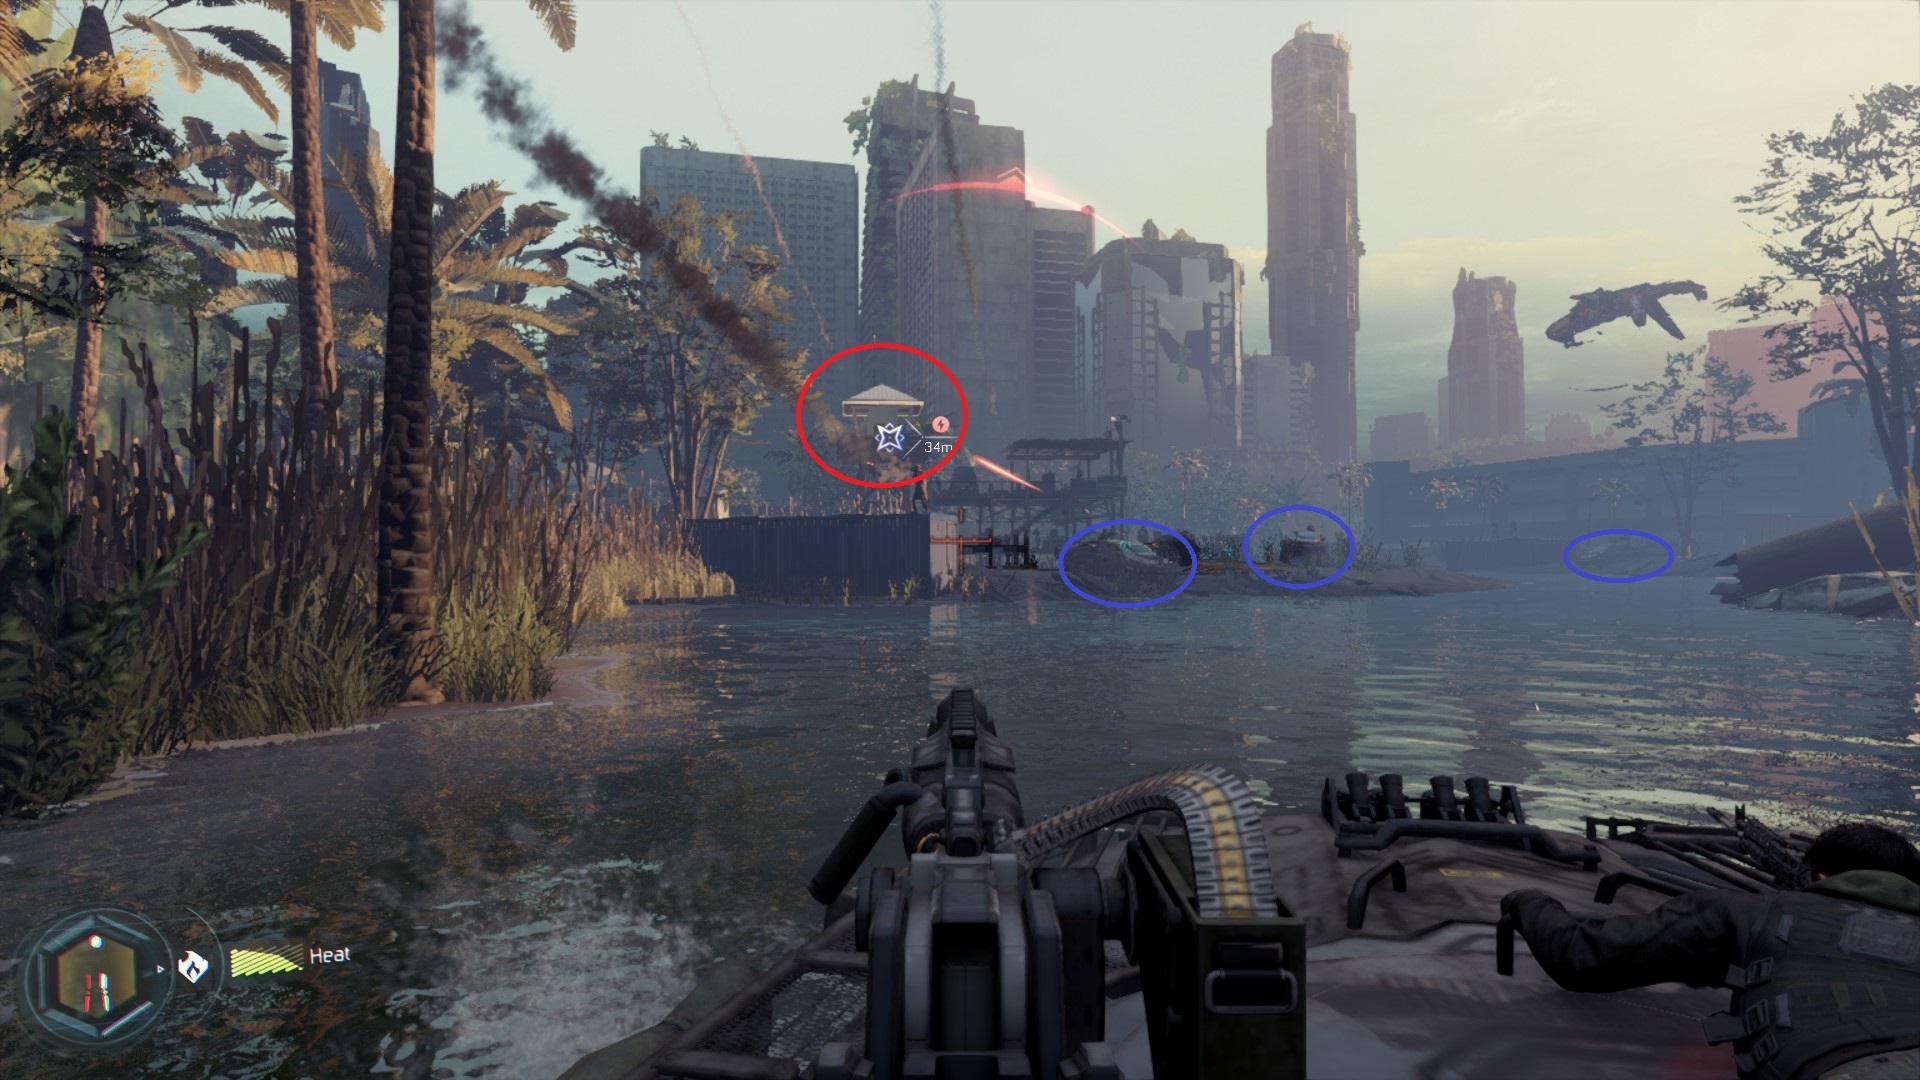
Then the swarm of talons comes - get the truck (4) on the bridge.

As you bear left, there is a tower (2) on the right with a truck (5) at the base.

Then the ferris wheel collapses. After you move through the foliage, there is another tower (3) directly ahead with a truck (6) at the base.

You'll twist right and up an impromptu ramp. As soon as you land, look directly ahead. Through the trees, you will hopefully glimpse tower 4. This one is well hidden, but if you know where it roughly should be, your gun can do the rest. Incidentally, I am not necessarily sure that this is part of the accolade. If you get the very first tower in the early part of this level, you don't need this one to complete the accolade. I would love some confirmation

There's a couple of twists and turns, then head up the ramp and destroy the final tower for 'Wreckage'.

I have included a video of the whole process here too.
Note that this accolade is potentially bugged, since it can sometimes carry over between runs. If you're having trouble, try getting half the towers/trucks, then 'save and quit' (assuming that you are in 'campaign' mode as I discussed in the introduction, then rerun and you might see that the accolades counter is still running from the previous attempt.
Hypocenter Part 1
Remarks:
- A class with a suppressed sniper rifle + Traversal Enhancement is necessary for the first few accolades. Make a second one with a thermal Gorgon (extended mags!) and Haymaker for when inside.
- 'Untouched' can come undone if swarmed by melee robots or through carelessly falling from great heights.
- This guide is split into two parts.
Go to the Facility Entrance
A stealthy approach is necessary for some of the accolades, so keep it in your pants for the first couple of minutes. Your first task is [color=red]collectible 1[/color], which is atop a crate beneath the yellow canvas close to the spawn.
Caught You Napping: Kill 3 snipers without alerting any enemies
Use a suppressed sniper rifle and knock out the two snipers on the rooftops. Then head into the building on the left and kill the third sniper, on the top floor.
: Kill 4 enemies from at least 65 meters away
Kill the two snipers on the rooftop and two other enemies at range.
: Stealth kill 7 enemies
If you mix the first two accolades, you can pretty much cover this one too. Of course, you don't need to snipe, any supressed weapon or melee attack is also a stealth kill. Enemy units in the buildings either side are isolated and vulnerable.
Video note: This would cover the other two accolades as well.
Two Birds with One Stone: Kill 2 enemies with one bullet
You don't have to do this here, but there are some good opportunities, particularly the cluster of three having a conversation. This one can also happen quite naturally if you use the technical's turret.
Video note: I recognise that I take my sweet time here, but I wanted to make sure.
Bombardier: While mid-air, kill 2 enemies with a rocket
Use your Traversal Enhancement to jump high and simultaenously grab a double kill. It is worth doing it here since there are lots of enemies and plenty of rocket launcher ammo.
Search the Coalescence Facility for the Signal Beacon
Head inside and go to the left to pick up [color=red]collectible 2[/color]. Then return to Hendricks. He'll use the recon drone and you'll proceed down. About halfway down, you encounter a 54i group. Annihilate them. Proceeding all the way to the bottom, you are attacked by robots. After fighting them off, check the side room for [color=red]collectible 3[/color].
Go To the Signal Source
Descend into the bowels of the faciltiy and you'll enter a room with the SP/Corvus mural, Hendricks will open a door and insist on following the blood trail. Right after you go through the door, take a left into an office for [color=red]collectible 4[/color]. Then, follow Hendricks into a two-level room. Suddenly, the robots will reanimate and attack.
Devastator: Kill 5 robots using melee attacks
This is probably the best place since the robots will charge you singly and you can use your 'Martial' Cyber Core to destroy them.
: Electrocture 3 robots in one electrical explosion
If you want this accolade, follow Hendricks through the ground level door. You'll come into a slightly more open area with a couple of glowing orange boxes. These electrocute enemies when shot, so dash around the area waking the robots, then lure them to the box and blow it.
After dealing with these robots, you'll head into a rec room with lots of funky white chairs. Hendricks takes a left down the corridor. Instead of following him directly, head into the large office on the right side of this corridor.
Good Listener: Listen to all of the audio recordings
Visit each of the computer stations in turn and listen to the audio recordings (there should be seven). You need not listen to the whole thing, merely activate each one.
Hypocenter Part 2
Investigate the Server System
After the next cutscene with all the pods, search the room for [color=red]collectible 5[/color] on the right side. Then, head down the next corridor and help Hendricks up. The door is opened and you enter a partially flooded area to do battle with robots. After clearing a path to the exit, you'll find that your enhancement systems come back online. As soon as this happens, turn right into an orange/red room with a broken, beeping t.v. to locate [color=red]collectible 6[/color].
Fight your way through the corridor of robots to get to the lift and hence the server system. When you enter the room, you'll see a large number of robots stood waiting.
Decapitator: Shoot the heads off of five robots in a row without missing a shot
Given that they are stationary and a long way away, they are perfect targets for precision headshots.
Complete the first two rounds of grenade throwing and defend Hendricks. When the third tower is exposed, destroy it as normal, but don't throw the grenade in. Instead, appreciate that enemies will continuously respawn in the vicinity of the tower as long as you wait to destroy it. This gives you the perfect opportunity to level weapons, increase your score, and complete any remaining accolades ('Scorcher' can be done here). When you're satisfied, toss the final grenade.
No Survivors: Leave no 54i survivors
The key to this one is a mix of speed and care, as well as exploiting its potentially glitched nature. The thermal Gorgon is perfect, though the thermal Drakon works as well. The section splits into two parts.
The first section is the robot corridor. There is a cluster of enemies close by and a handful in the adjacent corridor that runs parallel. Shoot the ones that are close, but keep your scope trained on the distance - enemies from the adjacent corridor are fleeing and need to be gunned down as they run for the exit. You don't really have time to reload in this first area which is why extended mags is so useful.
Once those are all killed, you can proceed to the next part. Switch to 'Overdrive' and your shotgun, and sprint through the corridor, ignoring enemies, taking a left into the partially flooded room (instead of going up the stairs). Try to get to the door at the other end and gun down anyone trying to get through it (you are now ahead of most of the enemies, so shoot them as they run past you). The accolade should pop before the next checkpoint, so you have plenty of opportunities to suicide and retry.
The accolade can be glitched as the video will demonstrate. If you can reach the exit door fast enough, that seems to count for the accolade i.e. the game knows that enemies won't escape so gives it to you. As you see, when I reach the far door, it starts to close and traps enemies, thus preventing their escape (assuming the ones beyond it drown).
Video note: This video has no sound.
Scorcher: Burn 4 robots to death in under 1 second
While Hendricks tries to open the door, you are left the task of holding off the robots. Switch to 'Immolation' and wait for a suitable cluster of robots.
After your swim out, there's only the final escape from the depth charges.
Mine-Sweeping: Destroy 10 depth charges
Doesn't come much easier.
: Complete this mission without taking damage from depth charges
Shoot all of the depth charges in the lower section before the first checkpoint. As soon as you pass the first checkpoint, swim straight up to the metal pipe. If you swim quickly, the depth charges won't get close. Follow the pipe and go left at the end. Destroy the two bots there and the depth charge that's ominously close. Then turn to swim upwards, shooting any charges that look too close. The key to this one is speed.
Vengeance
Remarks:
- Recommended loadout is a thermal sniper + suppressed SMG. The Enhanced Traversal kit is necessary for certain accolades.
- 'Untouched' is easy since this level has numerous stealth elements.
Aerial Assault
: Kill an enemy while in mid-air
Just jump (enhanced) and shoot someone during the mission (can also sometimes happen when using 'Rapid Strike').
Go to the Safehouse
The mission begins with you on the streets. Instead of following Hendricks, turn back on yourself and gather [color=red]collectible 1[/color]. Once you have it, follow Hendricks into the apartment block.
Aggressive: Kill all enemies in the apartments before Hendricks does
By 'all' enemies, it really just means three. Rush ahead and eliminate the soldiers quickly. This one is made much easier if you know which direction to go i.e. it may take a second attempt.
Video note: I think I end up massacring the civilians in the apartment too. This is not necessary for the accolade.
Once they're dealt with, you make your way out of a door/window(?) onto a rooftop.
Floor 'em: Take down all enemies within 6 seconds
You need to kill all of the enemies during the slow motion sequence i.e. ensure that everyone is dead by the time that the slow motion section ends.
A technical will turn up with some friends, but they will obviously be no match for your superior skill. Once everyone is pacified, head into the alleyway. You'll come upon some sort of execution scene where you ironically end up slaughtering everyone.
Show Off: Kill a sniper during a wall run
If you're having trouble, use a sniper rifle or even plant C4 and detonate it while wall running. You can also try for this further on.
Keep the next little section quiet (or don't). It doesn't really matter. You'll come to a mobile armoury where there's a chance to refit your class if you want something more stealth orientated. Don't worry if you haven't made anything specific, you are provided with a suppressed Sheiva which is very serviceable.
Like a Ghost: Get through the café undetected
Cut Ya: Kill 5 enemies in the café using melee attacks without alerting any other enemies
Whisper: Kill 5 enemies without any of them becoming alerted
Although melee kills are required for this, the 'Martial' core can cause problems by sending enemies flying, so use a different one.
Ignore the people being burned alive and proceed into the building on the left. Melee the guard within and bear left, heading up the stairs. Melee the two guards in the gym up top. Move out onto the balcony to the left. Once outside, you will be looking down a long alleyway with a sniper at the far end. Drop the sniper. You can sneak up to, then rush, the two guards in the alley with melee to complete these accolades. Simply exit this section and you'll complete 'Like a Ghost'.
Eye in the Sky
: Destroy all the Talons in the café
There are four Talons in this section, but it probably can't be mixed with the stealth parts.
You'll regroup with Hendricks and move onto some rooftops. Helpfully, Hendricks will offer to cover you as another stealth section ensues (with corresponding accolades). There's also [color=red]collectible 2[/color] in the temple gardens. The alleys to the sides offer opportunities for 'Show Off'.
To the Shadows: Get through the temple courtyard undetected
Remain undetected. This isn't too hard, just stick to the shadows and shoot anyone in your way. The jetpack can also help you to get over walls if you want to avoid engagements. Plus, you do have the ability to become invisible The video was taken after the accolade was already complete (and may be too sloppy to merit it) but shows a potential strategy.
Hendricks will tell you if you've been detected. If guards become suspicious, shoot them before they raise the alarm.
Stealth Double Kill
: Kill 2 enemies with 1 bullet 2 times without alerting any other enemies
There are numerous opportunities for this with enemy units working together in close proximity - check the side alleys in particular.
After you have made your way through the this section, you'll proceed through a building and get some dialogue from Goh. You'll then emerge into the middle of a battle. You've got two options for accolades here:
Counter-Snipe: Kill all the snipers in the parking garage wihout being hit by any of them
Focus your energy on the snipers while they are distracted by other units. Either use the plant pots for cover and snipe them, or use the technical. A thermal sniper helps pinpoint them, as does tactical mode.
Video note: I take damage from a grenade, in the video, not a sniper.
Bring the Pain: Kill 10 enemies with a mounted turret
Use either of the technicals' turrets to kill ten enemies. The technical positions are shown in Fig. 6.1. Note that technicals may be destroyed by the AI in battle. If you fail to attain the required number, there's a set of technicals in a later section (see Fig. 6.2). You can combine this with 'Counter-Snipe', though it is a little risky.

After killing the snipers, you can focus your fire on the remaining units. As you advance to the building an A.S.P. appears. Hijack it (it's usually faster) and use it to kill the Warlords who arrive as reinforcements. Once that's done, proceed through the judicious hole in the wall and turn to the left to secure [color=red]collectible 3[/color].
Moving up a floor, you come across yet another full blown battle. Instead of joining Hendricks on the ground, cast your eyes directly across to the opposite side and hijack the defence turret there to make your life easier.

Once you drop down, the battle will intensify and a P.A.W.W.S. will appear.
Now You're Mine: Kill 5 enemies with a P.A.W.W.S.
Hijack the P.A.W.W.S. and get kills with it.
Finish off everyone in the area however you wish (turrets, technicals, P.A.W.W.S., Talons) and head into the building. Deal with the first few robots and move up the stairs. You'll come into a large open room with a raised stage in the middle. On the right side of the room, on a table, you'll find [color=red]collectible 4[/color].
Rise & Fall Part 1
Remarks:
- Recommended gear is a longer range SMG (Kuda, Razorback) + sniper. Take Enhanced Traversal and Repulsor (because of all the vehicles).
- This mission has 17 accolades - remember to scroll down.
- Some of these accolades are very tricky - this is probably the most frustrating mission.
- 'Untouched' is easy if you stick to the objectives and don't waste time.
- This guide is split into two parts.
Go to the Holding Room
Your first task is [color=red]collectible 1[/color] lying on a desk in the interrogation area.
Protect Doctor Salim
It's time to enter the battle. Once an anonymous soldier has shielded you from the R.A.P.S., head into the main area and head left up the escalator. On the far side of the server bank you'll find [color=red]collectible 2[/color]. Deal with the enemy infantry, but don't worry about any of the accolades just yet. Make your way outside and mount up.
Demolish the Street
When you return to the fight, you have the spike launcher. Firstly, head out of the left-most 'doorway' in the bunker wall and scan the brick wall to the left for [color=red]collectible 3[/color]. Enemies here will respawn continuously, so it is an excellent opportunity to get the requisite score for the accolade. Aside from that, lots of accolades are possible in this area.
Aggressive Marketing: Kill an enemy with a billboard
Look up to the right where there is a billboard of vegetables with an enemy sniper. Fire a spike (aim away from the sniper - you don't want to kill him with the spike explosion) into the billboard. Detonate it and it will crush the sniper.
Lawn Darts
: Hit an enemy from very longe range with a Spike Launcher projectile
Aim at the enemies below this sniper. It takes a few shots to gauge the projectile drop; but assuming you are far enough away, it should count. Note that you have to kill the enemy by skewering them, not by exploding the spike.
Fly Swatter
: Kill a Talon using a melee attack
Jump on top of the tent in the middle and use the martial core to strike a Talon that gets too close. Note that you can't melee with the spike launcher and that the prompt for 'rapid strike' does not always appear.
Death From Above
: Kill 3 enemies while your feet are of the ground
These can be individual kills, so just jump and shoot enemies, or even plant spikes and detonate them while jumping.
: Kill 5 enemies with a Talon
Hijack a Talon and get five kills.
Having done these, plant all the spikes as part of the objectives. As your team requests that you fall back to detonate the explosives, remain where you are. Through each of the breaches, a squad of 4-5 robots should appear and remain in place. These will respawn if you destroy them.
Skewered: Impale 2 enemies with a single projectile launched from the Spike Launcher
You need to kill two enemies with a single spike shot. The best spot is either of the squads that spawn.
Lethal Sideways
: Kill 3 enemies in the same wall run
Plant spikes in areas that enemies cluster, then wallrun and detonate.
Wide Area Effect
: Kill 7 enemies with a single Spike Launcher detonation
Like Lightning: Kill 5 robots in under 1 second
Plant 2 spikes next to one group and 3 next to the other. They need to be close enough to do lots of damage (in the centre of each of the pairs). Use 'Active Camo' to make things more survivable. When you blow them, it should kill both groups of four and net you both accolades. If it doesn't work, kill yourself and try again. Indeed, enemies here respawn continuously, so you have plenty of opportunities. Note that you must get the seven kills with a single group of five spikes - you cannot plant 20+.
Don't worry too much about the R.A.P.S. accolades, these can be done later.
Rise & Fall Part 2
Go to Safiya Square
When you come out into the battle zone, move round to the right, taking the high ground. On the right hand wall you will see a doorway and some stairs down. In the room at the bottom, you will find [color=red]collectible 4[/color]. This whole area is called (imaginatively) 'The Alley'.
Clean Sweep: Kill every enemy in "The Alley"
As it says, make sure that no one survives in this area, including the open space with the Cerberus drones. It can be a little awkward to find everyone - check all of the side rooms, such as near to where the intel is located and unleash fireflies regularly. Unlike some similar accolades, there are no enemies that can escape (as far as I know), although this accolade does seem to be temperamental. It should unlock when you hit the checkpoint at the entrance to the building at the far end. If you hit the checkpoint before finishing everyone, it tends to void the accolade.


Here is a video if you're having trouble:
Open the VTOL Hatch/Destroy the ASP ML
You'll come to a crashed aircraft. Head to the right and pick up [color=red]collectible 5[/color], before helping Hendricks with the pilot. This will cause you to be deposited rather unceremoniously into the battle. You can find [color=red]collectible 6[/color] in the theatre/cinema on the right hand side.
Power Slide: Power slide between the A.S.P.-C legs
Simply slide through the legs of the tank (the first one works). You need to disable the repulsor shield with bullets first.
Destroy the first two A.S.P.s. When the third comes, don't destroy it immediately. Enemies will respawn continuously here (including R.A.P.S.!) which means that one can fish for the last few accolades.
Aerobatics: Wall run and kill a bipedal enemy with a melee attack before landing
Use the wall of the theatre when enemies start spawning and equip the martial core. Just tap melee, when prompted, while wallrunning close by.
Video note: The dialogue is running in the background so it takes a few seconds for the notification to come up - you can hear the sound though.
Epic R.A.P.S. Battle: Hijack a R.A.P.S., run over 2 enemies, and then run into another R.A.P.S.
Prepare for some frustration. Imagine yourself in a frozen forest. This is awkward because of the last specification. Try to hijack one of a pair that spawn - the other one will almost certainly make a beeline for you; you just have to squeeze in two kills it reaches you. Human enemies are much easier to run over than robots.
R.A.P.S. will respawn continuously, but this will probably take many attempts. I advise you to bring along a weapon that needs kills so that you can do something productive while you wait. It will probably take a lot of attempts.
Stuffed
: Destroy a R.A.P.S. while it is in mid-air
You have several options for this one - it is prone to some glitches (as the video will demonstrate). The canonical way would be to wait for a R.A.P.S. to get some air while it flies around the battlefield and shoot it. This is fine, it just relies on the R.A.P.S. doing what you want.
A better method is to hijack a R.A.P.S. and get some air, then exit the hijack, destroying it. This counts as a kill. In order to actually get into the air, get a straight section and use the jump ability of the R.A.P.S. (yes, it can slightly jump - uses the same button you would use to make your character jump). At the same time, press the key to exit the R.A.P.S., blowing it up in mid air.
Finally, you can wait for the hacking to glitch and for the R.A.P.S. to be thrown around in the air (see video). This has happened to me several times.
Demon Within
Remarks:
- Recommended gear is thermal sniper/LMG/AR + Haymaker.
- Prepare a class with a War Machine too.
- The first accolade requires a substantially different build, so should be done separately.
- The score requirement is quite stringent. Take your time to kill every enemy. If you use the thermal sight, you can see enemies before they 'spawn'/'animate', so you can ensure that you take the kills rather than your allies.
Defeat Sarah Hall
As it says on the tin, you have to defeat Sarah Hall. She has no shield, so you can just hit her with bullets/explosives.
Quick on Your Feet: Defeat Sarah Hall without taking any damage
This is a little bit tricky because of the spike launcher she has. Pack yourself a War Machine and Drakon. At the beginning, retreat to the left to the two pieces of beige masonry, one lying on the other (forming a handy crawlspace). Use indirect fire with the War Machine (no need to be conservative here). Drop your camo to dash for more ammo if necessary. If she jumps onto the building, unload Drakon shots. The key here is to dispose of her quickly.
Pursue Sarah Hall
Interface with Sarah and follow the trees etc. until you end up in Bastogne. From the spawn, bear right in the first bunker for [color=red]collectible 1[/color].
Volume of Fire: Kill 5 soldiers using an MG42 in Bastogne
The Fastest Gun: Kill 5 enemies in under 10 seconds
Now rush fowards up the left flank, past the half-tracks (use Overdrive/Camo as necessary) and you will eventually come to a gun emplacement. Jump on the MG42 and mow down the Germans you've just rushed past. If done fast enough, you should get the second accolade too.
In this same emplacement, you will find [color=red]collectible 2[/color] (likewise, if you're confused about where this MG42 is use an intel guide to figure it out).
Hat Trick: Shoot 10 helmets off German soldiers
Just get headshots - the helmets pop off of their own accord. This one should just happen by itself.
Fight through the waves of Germans. The sky will darken and the ground will start to shift repeatedly. Eventually, you'll come to an open area with an ammo crate, half track and small bunker. You can find [color=red]collectible 3[/color] here. More importantly, you will also find the Dire Wolves.
There are three accolades that relate to these wolves. You can't get all of them in one go.
Prey Instincts: Kill all of the Dire Wolves without taking damage
Mostly, you just need your wits about you. In the first area, two wolves are in the centre, with a couple more high up. Kill these four first. Further ahead, there is a walkway of sorts with some wolves that come to life (this is where I reload for the first time in the video) - use this as a chokepoint which is easily defended. The thermal sight helps to pick out the enemies.
: Kill 2 Dire Wolves while they are in mid-air
Past the ammo crate, there is a 'bridge' of sorts on which several wolves spawn. This is the chokepoint that I mentioned. On your right, you'll see the first jumpers. These are the easiest ones because you're not distracted. There are other places a little further on, but this is easiest - just follow the video.
Video Note: This video actually contains 'Prey Instincts', mostly unintentionally, because I was trying to highlight some of the other locations for 'Snagged'. I also recognise that I am fortunate the second wolf counted for the accolade.
Way of the Fist: Kill all of the Dire Wolves using only melee attacks
Use your rapid strikes and melee follow-ups. You want to take them in ones and twos rather than getting swarmed.
With the wolves pacified, there is another confrontation with Sarah, a platform jumping section and more cutscenes. When the action resumes, you battle across a farmstead. Look into the large barn on the left flank for [color=red]collectible 4[/color]. Proceed in the same direction, between the two half-tracks into a smaller shed where you will find [color=red]collectible 5[/color].
Beat You To It: Kill the Tiger Tank in the Village before it can fire a shot
After the map goes Inception-mode, rush forwards to grab the rocket launcher (if you don't have it left over from the first part of the level). As soon as you venture out a little, the tank will spawn. You can either play safe and shoot from cover, or just rush and circle the tank faster than its rotation. You can also use the War Machine if you're having trouble.
Jump into the building almost directly in front of your spawn location. It extends to the right and has an open roof section where enemies spawn. You will find [color=red]collectible 6[/color] in here. Fight your way through the graveyard to the chapel (beware glitches here). After a short cutscene, you'll be thrown into another confrontation, this time with a modern tank.
Defeat the A.S.P.-C
Unscathed
: Defeat the A.S.P.-C in the Cathedral without taking any damage
You are not allowed to take damage from anything, which includes enemy infanty. There are some safe areas on the staircases. Use your fireflies to eliminate the enemy infantry first. Once they're gone, you can focus on the tank. You'll need the War Machine (there's an armoury on the top floor).
Crucially, you'll need the fireflies again because the tank shoots at them. Release the fireflies, wait until the tank is distracted and shooting at them, then knock out its shield with gunfire. Dip back into cover and use the indirect fire of the grenade launcher to hurt it. When the shield returns, repeat the process.
This is actually easier on Realistic, since you know when you've been hit (because it will kill you). The repulsor doesn't really work unfortunately. The other major problem is that you cannot hack it.
Zombies
Incinerator
: Light 4 zombies on fire
This seems to be slightly glitched because the accolade only awards after the section has finished and sometimes irrespective of what actions you take (parts of the building catch on fire which inevitably causes the zombies to end up on fire - this causes issues with the accolade). A foolproof method seems to be repeatedly deploying Fireflies to set them alight.
: Headshot 10 zombies in a row
As it sounds - try doing this early on when the zombies are slower and less numerous. Listen for the headshot sound.
: Complete this mission without being damaged by a zombie
This is tricky solo, but much easier in Co-op. If you want to try solo, I recommend strafing from side to side, using your superior speed. Any SMG is good (I used the Razorback) or the Haymaker. Use Overdrive on your cores to improve your speed. Keep an eye on your ammo too. Note that you don't have to complete the entire section, only most of it.
: End Sarah's suffering with a grenade
When Sarah asks you to kill her, use a grenade. Semtex might make your life easier.
Sand Castle
Remarks:
- Recommended gear is any AR + SMG/Shotgun. Repulser Armor is useful.
- Accolades are simple, but awkward to explain because you transition from from foot to jet frequently - you are going to have multiple plates spinning. Make sure that you read the whole thing first.
- This is probably one of the easiest levels for 'Untouched' and accolades in general.
- There's only 15 to balance out the 17 on Rise & Fall.
Eliminate Enemy Air Threat
Dog Fight
: While piloting the Bullshark, shoot down 8 enemy VTOLs using only guns
Use only your guns. not missiles, in the dogfights (there are two jet section in this mission). The number of enemies you can shoot down is based on how quick you are. You need to destroy four in each section, with a potential maximum of six, maybe seven, in each.
Video note: I have spliced together the two jet sections in the video.
Fill It With Holes: While piloting the Bullshark, destroy all A.S.P. units using only guns
Take out the marked ground defences (A.S.P.s) with your machine guns only.
: Evade all missiles while eliminating the phantom's air defenses
The general tactic is to move quickly and blitz enemy defences. Use your superior manoeuvrability to dominate. Obviously it might be best to do this separately from the other accolades here so that you can deal with the enemy threats as quickly as possible.
As long as you don't destroy the final A.S.P. in this section, enemy infantry keep respawning. You can use this to ensure you acquire 'Raining Fire'. That being said, you'll probably get enough anyway.
Raining Fire: Kill 90 enemies while piloting the Bullshark
The accolades menu keeps a counter - Wraiths and some aircraft seemingly don't count.
: Shoot down 7 Wraiths
Shoot down seven Wraiths. These spawn on a lower platform level. These continuously respawn (albeit slowly) if you don't dismount, even if you destroy all of the A.S.P.s.
Disrupt NRC Communications
Pick the left landing spot (if you are facing the platform in VTOL mode) and dismount. Head towards the objective building. Instead of heading to the roof, go one floor down to find [color=red]collectible 1[/color]. Protect Kane as she works on the first half.
Destroy VTOLs: Destroy all VTOL troop carriers
An enemy VTOL appears almost exactly above where you landed when progress has reached about 10%. Two rocket launcher shots is enough, but it doesn't stay around for long. A second VTOL appears around the 60% progress mark to the left of the first one. You need to keep an eye out for these.
TNT
: Kill 15 enemies with explosive containers
Wait for enemies to cluster near barrels and blow them. This map features a lot of barrels, so this one should be quite easy. Do bear in mind that destroying VTOLs means fewer boots on the ground. Try to manage five on both the sections where you cover Kane and pick up the last ones in a later section.
The procedure for the second comms array is analagous to the first. You reboard your Bullshark - use your guns only to disable the A.S.P.s ('Fill It With Holes') and shoot down any Wraiths + kill infantry if you need more. When you land, head into the buildings to the left for [color=red]collectible 2[/color].
As soon as the process starts, a large enemy contingent approaches from your right - there is a very judicious barrel that can net lots for the TNT accolade. Indeed, the second area has lots of barrels on gantries that make TNT easy.
Two VTOLs will appear at this one, as well, in a similar fashion (one almost immediately, one just after halfway). Take these down too.
Locate Taylor and Maretti
The game switches to an indoor section. There isn't much to help your accolades here until you get back in the jet. You'll be dogfighting again, so use your machine guns only to get the 'Dog Fight' accolade.
Provide Fire Support
Back into VTOL mode, you must provide fire support for friendlies. Destroy the final two A.S.P.s with machine guns to achieve 'Fill It With Holes' (the accolade won't drop until after this section).
Defense: Kill 45 enemies while defending Khalil's Squad
This is not hard; just move from side to side, strafing with a mixture of missiles and guns. If you are too slow, your allies will take the kills.
: While piloting the Bullshark, kill 5 enemies with one missile
Wait for a cluster to spawn and drop a missile in.
: Kill 10 enemies in under 2 seconds
Wait for one side to fully spawn and cluster, then strafe across unleashing everything. Also, if you feel like you missed your opportunity, shoot at the friendlies (green markers) and you can go back to the checkpoint to try again.
If you miss the last two, the next section (clearing a landing zone for the third time) may also be viable. Note also that waiting for the perfect shot(s) for accolades might leave you with <45 kills, voiding the 'Defense' accolade.
Apprehend Maretti
The final VTOL appears soon after you land above the helipad next to yours. Note that this one sometimes has issues with target lock, so just use direct fire when it is stationary.
Fight your way through the infantry. There's still more barrels here (including a nice set just before the rappel) if you're missing the TNT accolade. After the breach, clear the corridors of enemies (you can rush this on recruit since you should already have plenty of score).
Evasive Maneuver: Defeat Maretti without getting shot by Maretti
Once this sequence starts, you'll want to dash to some better cover. From here, you'll need to use your Overdrive to get to the first generator. If you get hit (by Maretti - damage from grunts is irrelevant for the accolade ... though it does hurt), then suicide and restart.
Once you've interacted with that, you'll need to dash to the second. If the infantry are a problem, use Fireflies (don't shoot if you want the second accolade). Once generator two is done, Overdrive again up the steps and the accolade should be complete.
Interestingly, there is a minor checkpoint after you interact with the first generator, so you can die suicide and return here without voiding the accolade (which actually happened when I made the video).
General advice is just to sprint a fast, direct route and slide at the end. Jumping slows you down and almost guarantees that you'll be hit. Overdrive helps a lot, but the camouflage seemingly does not. You'll probably know if you get hit, but if there's any doubt, Hendricks will tell you to 'keep your head down' the first time you are sniped - this is your cue to restart.
All Too Powerful: Defeat Maretti using only Cyber Core powers
Don't shoot at the troops. Simply put on Overdrive and rush from generator to generator. The idea is that in the room you use nothing but your cyber abilities, thereby defeating Maretti using only them. Accolade should pop when you breach the door.
Video Note: This is actually two takes put together, highlighting the checkpoint that I mentioned. This is a perfectly valid means of doing it.
Lotus Towers Part 1
Remarks:
- Recommended gear is AR + Haymaker/Brecci. EMPs are also useful.
- These accolades are tough because they rely on factors largely beyond your control (e.g. whether Hendricks wants to steal kills).
- The score requirement is very stringent.
- 'Untouched' is not too bad if you play the vehicle sections sensibly. Be wary also of falling off of elevated environments.
- This guide is split into two parts.
Crowded AO
: Complete this mission without killing any civilians
Nothing massively outrageous here, just watch your shots in the early sections. If necessary, play a 'safe' playthrough where you allow your allies to do the leg work to minimise risk. Interestingly, killing only one civilian doesn't fail the mission (two or three seems to be enough), so if you void the accolade with a single kill, there's no way of knowing.
: Kill a robot while it is in mid-air
There are a couple of occasions where robots jump down from ledges. Keep an eye out (it's not necessary scripted). This is the sort of accolade that happens by accident. The best spot is towards the end of the level when you are outside on the platforms which I mention when we get there.
Assassinate General Hakim
Other Ways
: Kill 12 NRC riot shield soldiers without using bullets
As soon as the mission begins, look down the hall to two riot shielders trying to hold back the crowd. Use Sonic AP to incapacitate them. Do something similar for the next group you run into. You should have five by the time you reach Hakim. I'll point out the rest of the possible locations as the guide goes on. Any method that does not involve shooting is fine - Cyber Cores, melee, explosive.
: Put 7 NRC soldiers who are under attack out of their misery
As you proceed through the first few corridors, you'll see civs attacking soldiers - shoot the soldiers to put them out of their misery. You should be able to manage five before you get to Hakim. After killing him, take the first right and you'll see two more available to be put out of their misery for the seven total. If you're still short, there's one in the mobile shop area and two at the top of it (Fig. 10.1 and 10.2 + 10.3 respectively)
Video note: Firstly, the shotgun is possibly not the best choice with so many civilians around. Secondly, the kill only counts for 'Mob Justice' if you get the hit marker - there are five in this video which count before Hakim is reached (the soldier holding the door counts). Thirdly, every available riot shielder is shown in the video, so the numbers in my takes actually go beyond the requisite amount.
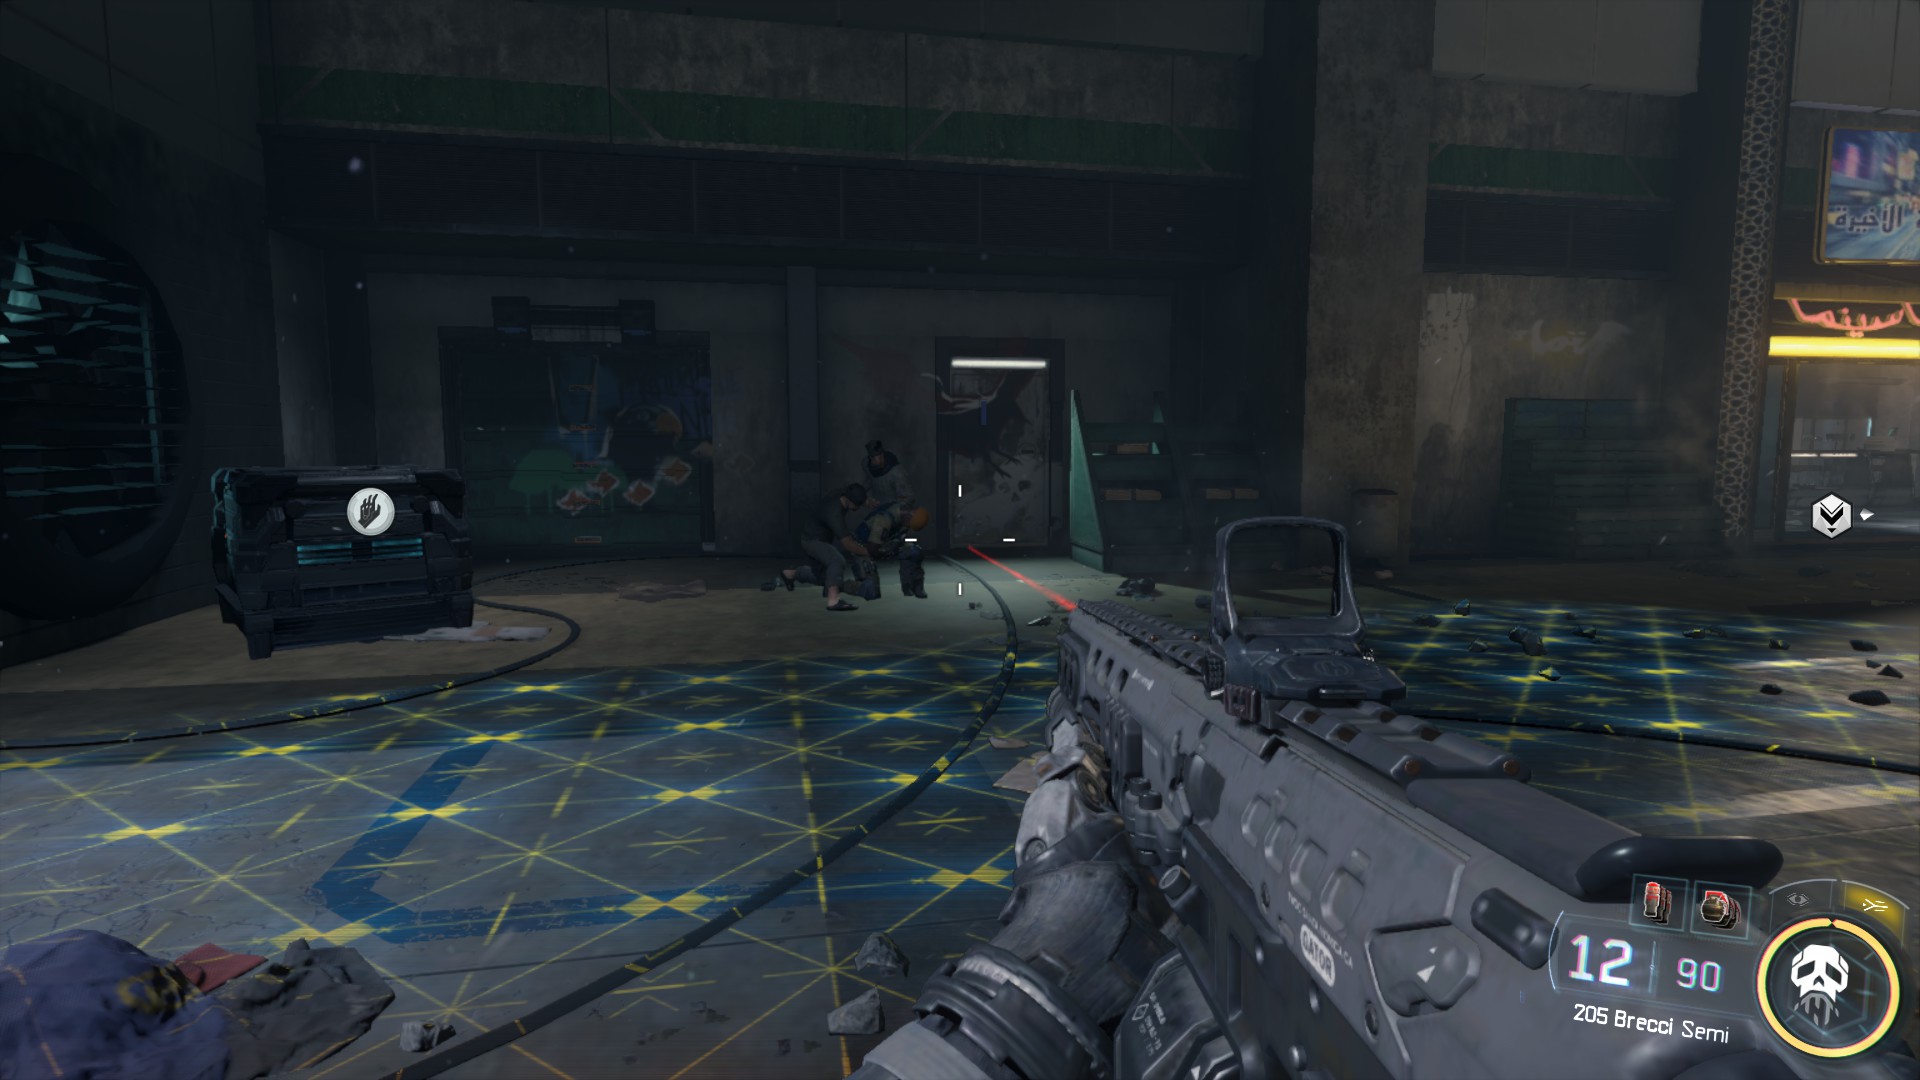
Capture the Security Station
Another four riot shielders turn up in the first engagement area (2x2). After dealing with these troops, head up the stairs. You'll emerge into the mobile lifts area. On your left, you'll see another soldier for 'Mob Justice' (Fig. 10.1). Two more riot shielders appear in the fight by the lifts. That makes 11 in total so far (though Hendricks often steals one or two - don't worry if you only have 9 or 10).

Ride the mobile shop up to the top floor (the +1 for 'Mob Justice' that I mentioned is directly in front of you when you arrive - see Fig. 10.2). In a shop on the left flank is [color=red]collectible 1[/color]. If you proceed through, you'll see yet another potential target for 'Mob Justice' (Fig. 10.3).
As you proceed down the corridor, R.A.P.S. will turn up, as will one more riot shielder.
Rolling Death: Kill 10 enemies using R.A.P.S.
Hijack the R.A.P.S and try to run over as many people as possible (not civs). It counts towards 'Other Ways' if you run over the riot shielder. The best targets are the other R.A.P.S. because they roll into you, explode (counts as a kill for the accolade) but don't cause damage. Four R.A.P.S come in the first group, so hijack one and let the other three suicide for three kills. Then acquaint yourself with the group of infantry that spawns, where you can hopefully get two or three more. The detonation of the R.A.P.S. is not actually that effective - it is running over enemies that nets you the kills.
Prep your Hijack again before you hit the checkpoint at the corner. When the bots and R.A.P.S breach the wall, hack a R.A.P.S and try to score as many kills as possible again. Hopefully, by this point you've managed at least seven, though it is entirely possible to have it finished here. I'll point out some more spots later in the mission.
Clmb up into the vents and breach the security station. You'll find [color=red]collectible 2[/color] in a locker on the left side of the room.
Capture Taylor
Once the hack is complete, the wall to your left will be breached. You have two choices here; I recommend doing one accolade then commting suicide to do the other.
Stun and Gun: Kill 5 disabled robots in under 5 seconds
Wait for the smoke from the breach to clear and kill the R.A.P.S. as they roll through. Then move into the breach and drop 'Mass Paralysis' onto all five robots. Slaughter them quickly for the accolade (Haymaker/Brecci is great here).
Alternatively, have your hijack ready again and take control of another R.A.P.S.. You should be able to finish 'Rolling Death' here, but more likely Hendricks will steal lots of the kills. You can either keep replaying until you get it (checkpoint is literally just before the breach) or pick up the R.A.P.S. kills later.
Allow the friendly VTOL to hose the next set of hostiles and head into the next engagement. Deal with the infantry and get into the mobile shop. 'Crowded AO' should complete here - if it doesn't then you've killed civs.
After it stops prematurely and you exit, fight across the bridge into a building. In here, more R.A.P.S. will turn up, so this is definitely the opportunity to finish Rolling Death. You may also see robots dropping from a higher floor, so there is potential for 'Grounded'.
Once the room is clear, you'll proceed up a ramp (or wallrun the billboard like Hendricks). When you enter the room, you'll see a R.A.P.S. roll over a friendly - this can be hacked if you still need more kills on it. Otherwise, head quickly up the stairs across the room. Slay the guards and grab [color=red]collectible 3[/color] on the table. Then look past the table, through the window, to the top of a staircase - you should see some riot shielders and a sniper. Use your Sonic AP to finish up 'Other Ways'.
Mini-Tank!: Kill 5 robots with a Cerberus
In the next area, rush straight in towards the sentry gun, then hang a left. Down in a small space to your right will be a Cerberus. Hijack it and use it to destroy the five robots (you can also try for 'Stun and Gun' here) that have appeared at the far end. Make sure that you use the machine guns only, since the rockets can blow up scenery items and prevent the kill from counting as a Cerberus kill.
This one is infuriating because Hendricks loves to kill the robots before you can get to them. Only five spawn here, so don't waste time on the other infantry. You can always suicide to retry.
Lotus Towers Part 2
After the cutscene, you'll start to see rogue robots around. The interesting type (for accolades) is the type that charges with the electrical arcs around them (Fig. 10.4). When they get close, they will start to glow (Fig. 10.5). Try to get these before Hendricks does.
Hold It: Destroy 10 charging robots before they detonate
Look for the robots with electrical arcs on them that charge towards you. Hendricks is unusually aggressive in this mission which make it much harder. The best tactic to rush ahead as quickly as possible to activate the enemy spawns, but then to drop back and allow the enemies to charge at you.


Typically, the robots spend a few moments acquiring you as a target, then make a mad dash. You should be able to grab at least three in the first area, before you get outside. When the section of masonry above the door explodes (instead of the door opening), you enter a new area where you can pick up at least two more.
Video note: This contains the entirety of 'Hold It', 'Killswitch' and 'Grounded'. The 'explanation' of 'Killswitch' and 'Grounded' is good, but 'Hold It' is very difficult to clarify. Honestly, I feel that my attempt was a little too aggressive - I shot robots before they started charging; but I hope that you get a feel for the speed. Extended mags would also have helped greatly.
Furthermore, note that some robots charge at you, but do not count. This is because they are not the explosive type. This rather complicates the accolade and makes it feel very temperamental.
Go to Tower Two
You'll clear a large piece of debris together with Hendricks, then emerge into the outside world. Some sporadic engagements with robots/NRC follow - try to prioritise the ones that are charging at you. You should be able to grab a couple more for 'Hold It'.
At some point you'll emerge into a corridor of sorts with some stalls in it. Climb on these to get onto the roof and find [color=red]collectible 4[/color]. This area also features robots dropping down and is a good place for 'Grounded' - see the video. Finally, climb onto the crashed VTOL and back inside.
Go To the Mobile Shop
There's a brief cutscene and then you continue along a corridor. The wall blows and a robot charges out (useful for 'Hold It'). Climb the stairs and you'll emerge back into a hellscape. Drop down and go left. You can pick up the remaining robots for 'Hold It' here. Do note that the 'Killswitch' accolade interferes with 'Hold It' since the robots from the housings are potential chargers. As such, you might want to complete 'Killswitch', then return to the checkpoint to try for 'Hold It'.
Killswitch: Kill 7 robots as they are powering on
Try to kill robots before/as soon as they emerge from their housings. Sprint forward and drop the first two in the left corner. Head up the ramp and drop at least three along the walls. Head up the final staircase and spray the housings in the corner for the remaining two. If you fail, suicide and try again.
You'll head upwards again through the skeleton of some sort of building, just before a large bridge - [color=red]collectible 5[/color] is present in this wreckage on the floor to your left.
Bring Down the VTOL Leviathan
You can find [color=red]collectible 6[/color] in the set of the ruins to the right of your starting bunker.
Minute Waltz: Take out the Mothership in less than 2 minutes
Don't play about; just hit the engines repeatedly with either the Drakon, minigun or XM-53.
: Bring down a Mothership using a Minigun, an XM-53 and another weapon
Use a primary, the XM-53 and a minigun to take him down. Simply damage him with two of the above, then finish him with the third. Indeed, you don't even have to finish him off; damaging with all three is sufficient. The XM-53 is found in the armoury closest to you, while the miniguns are found in the armoury on the opposite side.
: Take no damage from missiles fired by the Mothership
The missiles travel slowly and are directed against the structures primarily. From the start, drop some small arms fire with your primary whilst making your way to the XM-53. Aim for the inner engines first whilst sheltering inside from the missiles - you should be able to destroy both of them before he drops down to deploy R.A.P.S.. When he moves away to launch them, rush to the other armoury to get the minigun.
He remains stationary, so you can hammer shots into one of the outer engines. When the R.A.P.S. land, destroy them with the minigun. Hammer the final engine before his missiles blow the armoury apart.
Video note: This contains 'Triple Threat', 'Minute Waltz' and 'Nopenopenope'
Skeet Shoot: Eliminate 3 R.A.P.S. launched from the Mothership before they can land
After a while Taylor will drift off to one side an eject R.A.P.S. from the top. These are the objects that streak high into the sky. Use the minigun to shoot these down (you can hit them even if they are far away). Note that he deploys R.A.P.S. several times, so you need only hit one each time. If the minigun doesn't work, try the Drakon with ELO and abuse the autoaim feature (thanks for The S Bot 9000 for that)
Video note: In the second clip, the larger objects that deploy first, low to the ground, are Cerberus drones and are not important for the accolade
Life Part 1
Remarks:
- Recommended gear is AR + Haymaker with semtex. The Repulsor is helpful as usual. I also recommend 'Danger Close' since you'll be using a lot of grenades. Copycat (upgraded) allows you to pick up grenades off of corpses, effectively bolstering your supply, and is therefore useful too.
- Set up another loadout with the SVG.
- Keep a loadout with the War Machine handy as well (probably best not to couple it with the SVG).
- Despite this being the final mission, these accolades are actually quite easy. However, completing the whole thing without dying is rather tricky, even on recruit, because of the volume of enemies.
- This guide is split into two parts.
Explosive Containment
: Destroy 35 explosive containers
You'll need to destroy 35 of these. I'll try to point them out as we go. The 'Cacophany' ability detonates these from range, so can be used to scout any immediate area and identify them. Mercifully, no enemy needs to be nearby when they explode. I have kept a running total based on a single playthrough. As long as you match the numbers I post at each checkpoint, you'll get it. It was simpler this way than writing a very lengthy walkthrough. I do not pretend to have found all of the containers, so it is a guide only. The total number on the level is ~40, so there is some leeway if you're one short on a section.
Assault the Coalescence Headquarters Building
Immediately flip round and find [color=red]collectible 1[/color] on a black doorway. Deal with any robots on the first street and you'll reach the first proper engagement that provides opportunity for several accolades.
Robo-Slappers: Kill 5 robots in under 10 seconds using only melee attacks
Equip your Martial core and use the combo strikes to get this. You'll want to wait in cover for a few seconds, when the battle starts, to ensure that enough robots spawn at one time.
I Know Now Why You Cry
: Kill 10 robots using mounted turrets
There is also a turret here, in line with the vehicles, on the far side (Fig. 11.1). Kill ten robots. If you don't reach ten, there's a turret in a later section (Fig. 11.2). Note that only robots count - Talons etc. do not.

Jump up into the parking structure and blow the set of barrels you see. There's another on the upper floor (2/35).
Pass through a railcar and emerge into a terrifying landscape. Stuff's exploding everywhere. Fortunately, there is ample opportunity for accolades. In particular, note that if you don't complete the hack on the far door to advance to the next section, enemies respawn continuously. This is therefore a great section to pick up lots of accolades.
Explosive Entertainment : Kill a group of 3 or more enemies in one shot with an explosive weapon
This can be quite tricky. Grab the War Machine lying against a set of boxes on the right flank (Fig. 11.2). Find a group of three and kill them. The best opportunities are after both A.S.P.s have been destroyed - robots tend to cluster around the door you need to hack. You can also try the XM-53. If you're having trouble, you could try waiting until you fight human enemies since they are less resilient.
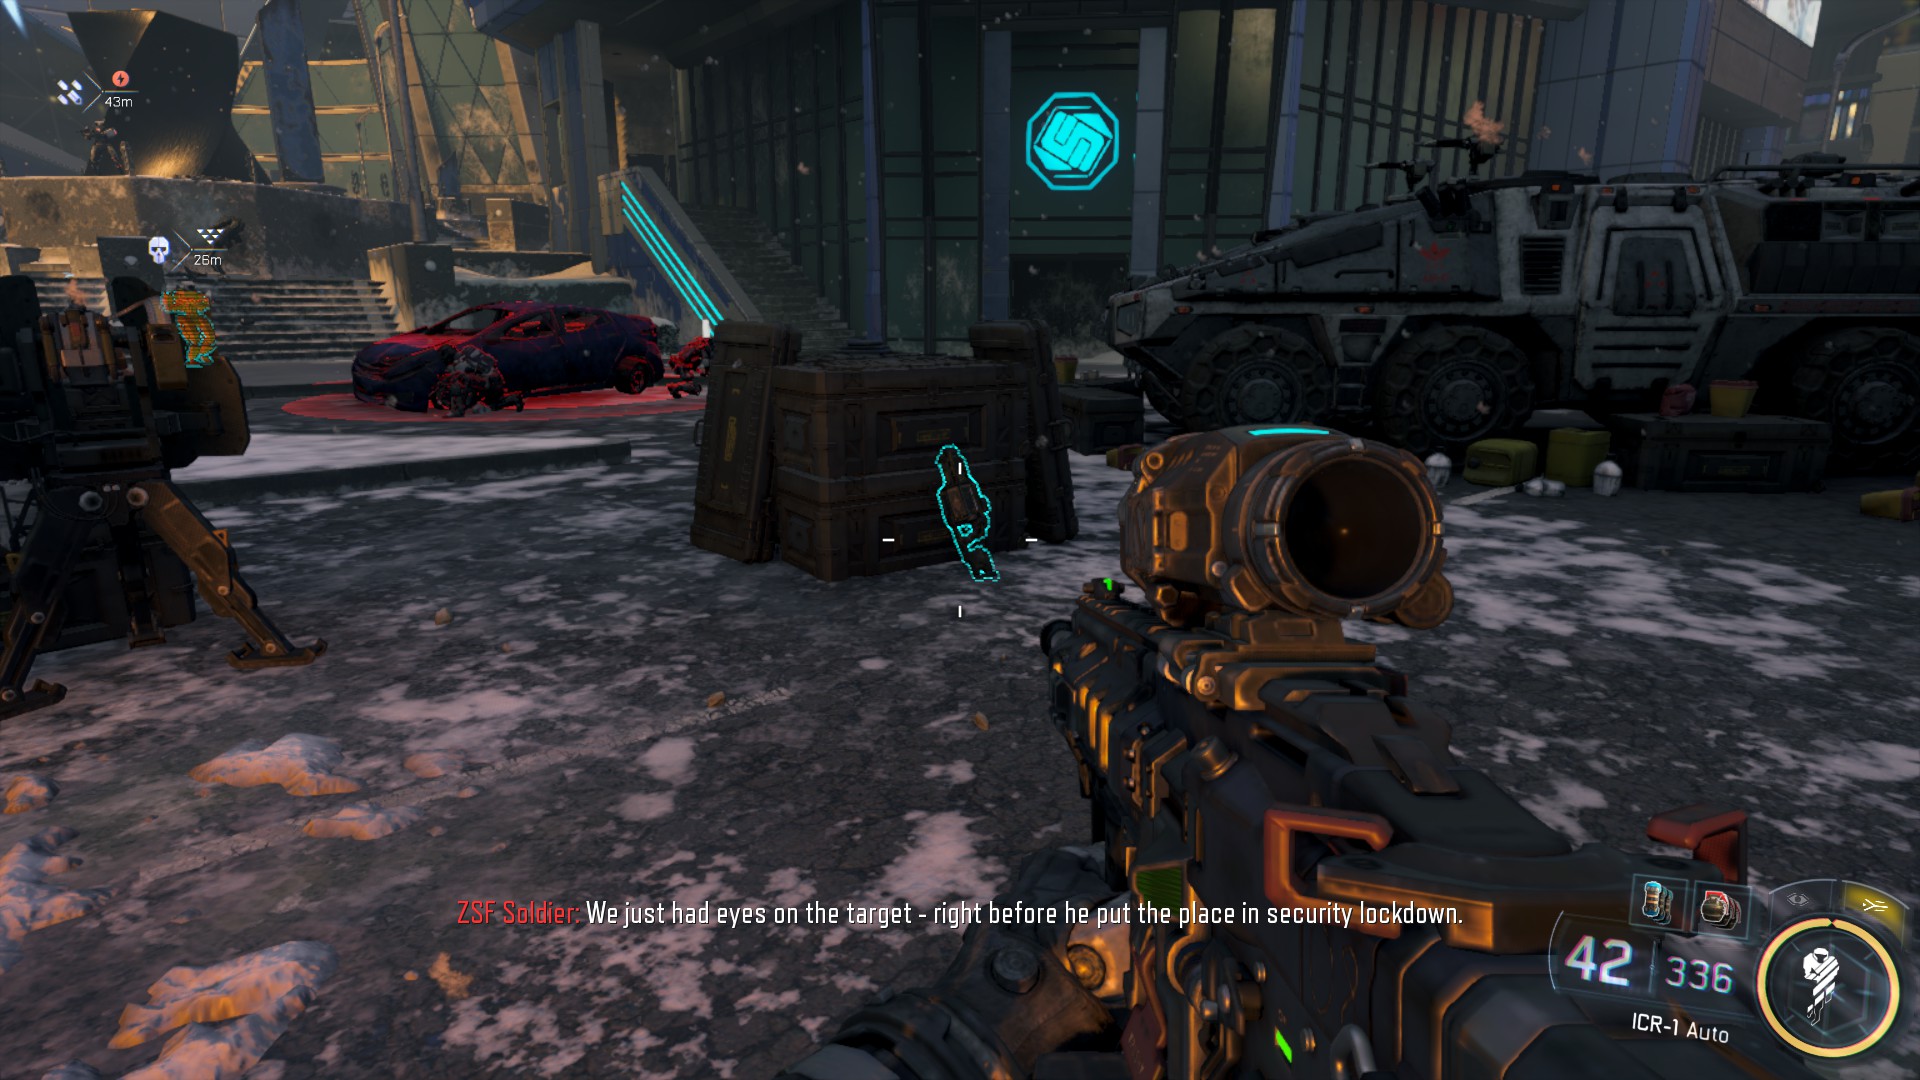
: Kill 20 robots with a grenade launcher
Kill 20 bots with the grenade launcher. If you bring a War Machine on a loadout, it counts too. I recommended having a class prepared purely because you might switch out your weapons by accident.
: Kill a P.A.W.W.S. without it damaging you
Several strategies here. You can simply snipe from long range, either with a Drakon or the turret. You can use the rocket launcher. Alternatively, camo up and head into one of the side rooms with an ammo crate. The P.A.W.W.S. spawn right outside (Fig 11.3). As soon as they do, spam your grenade launcher shots out of the door. Because you are so close by, they don't have a good angle on you.
The P.A.W.W.S. will respawn over time, as long as you don't go through the far door, so you have plenty of chances. If it's really presenting an issue, there's a section further on (inside the HQ) with two P.A.W.W.S. - see Figure 11.4 - that works very well too.

: Take down a P.A.W.W.S. using only a pistol
Grab a class with the L-CAR 9 (the Field Ops kit handily has one) and go to work. It's surprisingly effective. As always, the Annihilator doesn't work.
: Kill 2 enemies with 1 bullet
There are many places to do this. The obvious choice is to wait for human enemies in the later sections and line them up, but there are opportunities with the bots. If you have a heavy sniper loadout (SVG), then you could try it. Talons unfortunately don't seem to count. Frankly, this is the sort of accolade that ends up glitched and usually drops by accident.
Locate Hendricks
After you've got inside, you face a more modest engagement with robots. Don't forget to destroy the two containers in the room. Drop down into the next fight with two P.A.W.W.S.. Again, destroy the two containers in this area (there's a small one upstairs). By using the high ground, you have an excellent opportunity for 'Dodge This' (Fig. 11.4).

In the next area Kane will meet a grisly end (which is a shame, because she was very likeable). Console yourself by picking up [color=red]collectible 2[/color] (6/35 containers so far).
Once you get out into the snowscape, start using your grenades to get kills - you're going to need 20 by the end.
Perfect Timing : Kill 20 non-robotic enemies with grenades
Just keep using grenades any time you are near ammo crates. Whilst the reference to timing implies frags, semtex is much easier to spam repeatedly. If you have 'Copycat', you won't need to keep returning to the ammo crates. Alternatively, you can complete this more easily by using the War Machine from the class you prepared.
: Kill 3 non-robotic enemies in under 5 seconds
There are several good opportunities immediately. When you first arrive in the forest, several enemies spawn around you. If you aren't quick enough, more spawn on the hill as you leave (Fig. 11.5). Another group spawns in the water - there are plenty of good spots. In reality, you can probably leave this one and it will complete itself by accident.
: Melee kill 5 non-robotic enemies in under 10 seconds
After you slide down the hill, you'll find yourself in a small body of water. Equip your martial core and use the rapid strikes to chain the kills.
Finish up the enemies in the water and you'll proceed through a set of vines into an open area. There are three 'portals' with vines. Head over to the first set.
Life Part 2
I have divided this part of the mission up via the portals. Listing every single container would be painstaking, so I'll keep up running tallies via the ammo crates (the big ones, not the small boxes). I've also left it quite brief, but take your time to search thoroughly.
Section 1
Burn the first set of vines and start getting into the combat proper. Taylor is now with you (though he is pretty incompetent). Make sure you don't miss any containers.
By the time you come to the first ammo crate, you should have at least 14. Replenish your grenades and then go nuts. After the section with the car headlights, there's another ammo crate on the left, in a corner. You should be up to about 18 containers. By the end, at the portal, you should be on 20. Kill the talons and burn the heart.
Section 2
Once you go through the portal, you reach a sandy area. Proceed up the hill, while Taylor starts talking about how the AI wasn't even that smart. When you go back down the other side, you'll see one of those extending bunkers from Rise & Fall and some other buildings. You'll want to look for [color=red]collectible 3[/color] here, but it involves climbing on the building with the balconies to the furthest left (just read the collectibles guide on Steam or Youtube it).
By the end of the mini section (the next ammo crate), you'll want to be on 25 containers destroyed. After a brief engagement with more troops and Talons, there's another crate (27/35 containers). Don't forget your grenade kills either.
After you descend the stairs, there's a tight grouping of enemies (they respawn with the crows) which offers a potential opportunity for 'Quickslap'/'Clip Their Wings' if you're missing them. Head into the portal (31 containers).
Not a Fan of RAPs: Kill all of the R.A.P.S. in the mission before they do damage to any friendlies
Kill the six R.A.P.S. (without either of you taking damage) to get the accolade. Note that it doesn't matter whether you or Taylor get the kills as long as no one takes damage. The R.A.P.S. come in three sets of two.
Section 3
Emerge from the blood lake. You'll find the remaining containers in this section to finish 'Explosive Containment'. There's another swim and another gun battle. If you're a couple of containers short, you can pick up some in this last section. Then let the current carry you into the portal.
Got 'em All: Destroy all depth charges before they self-detonate
You'll start this section underwater. Simply advance slowly and shoot all of the depth charges. You don't appear to have a breath limit, so make sure you search thoroughly if the accolade doesn't come up. Allowing any to touch you and detonate voids the accolade. The only issue is the colour of the water which makes visibility very poor - you might find your enhanced vision mode useful. The accolade drops when you emerge from the water.
Finish up this section by burning the third heart.
Finale
While your DNI is purging, move into the next room. At the far end, you'll see a desk beneath the Coalescence logo. Go around the desk to claim [color=red]collectible 4[/color], the final one.
FAQs
Q) Why do some accolades have videos, but others do not?
A) Generally, I have not bothered to add videos where I felt the accolade was simplistic i.e. that it was sufficient to cover it in words. Also, I can only ever achieve the accolades twice (once online and once offline). Since I did an online playthrough before I posted this guide or even thought about videos, I basically had one shot to get a decent recording (actually my offline progress did get reset at one point, so I did get a second chance to do some). Inevitably, one or two were not of good enough quality to post.
Q) How do I do X accolade - your guide isn't helping?
A) Post in the comments which one it is, what's going wrong, and I'll try to help/throw the issue open to the community. This is only the first incarnation of the guide.
Q) What do you mean by X set of directions?
A) Again, this is my fault because a section is unclear. Let me know which one it is and I'll work on it.
Q) Could you do a video for X accolade?
A) Yes, if there's an accolade for which a video would be helpful, I am more than willing to do one. I didn't video quite a few because it seemed superfluous, but I am happy to make them if clarity is needed.
Q) Why isn't the accolade unlocking?
A) There are several possibilities:
- You have, in fact, missed the criteria. There is sometimes a bit of subtlety the conditions of completion. Be patient and try again.
- You need to advance further on in the story. Sometimes accolades don't unlock until you visit the next checkpoint.
- A glitch of some description, or something temperamental - it does happen and there's not much you can do. I have had occasions where I felt I deserved an accolade and didn't get it, as well as vice-versa. Sometimes you can do the same thing twice and get the accolade only on the second run.
Q) I lost all of my accolade progress - what happened?
A) The usual reason is that you're in 'offline' mode. If you play in offline mode, you progress completely separately from online. You should be able to select 'Play Online' from the game's main menu. You sometimes get thrown into the offline if you have internet problems. If that's not the reason, then it's a glitch and you need to contact the game's support team.
Q) Is the bonus campaign relevant?
A) No, the bonus campaign does not feature accolades and is entirely separate.
Q) Can you physically help me with X accolade?
A) I'm not doing requests for Co-Op campaigns. If you're struggling, post in the comments and we'll talk it over.
Q) How did you record the videos?
A) I just used Nvidia's Shadowplay software and uploaded the videos to Youtube.
Concluding Remarks
I hope that this guide has proved valuable. It should clarify the areas where people are struggling. When getting the accolades myself, I found that the two biggest issues were either unclear descriptions or uncertainty about the best opportunity - this guide should aid you in both regards.
Once I have completed an accolade, I can't return to test new methods. Yes, I can play offline, which progresses separately (this is where the videos have come from), but testing repeatedly is out of the question. This generates a creative inertia where I can't figure out new methods. That's why I need alternative view points i.e. suggestions for alternative strategies.
Feedback is always valuable - I keep an eye on the comments here and always appreciate responses from the community, particularly since I am rather new to guide writing.
Finally, I hope your hunt for accolades is going well,
Perdiccas
Version History
v 1.00 - Main Guide written
v 1.01 - Added some brief coments about using story checkpoints to help retries
v 1.02 - Fixed some spelling errors and clarified a few statements + added collectible 1 to Hypocenter
v 1.05 - Edited some explanations and started to add pictures/videos
v 1.10 - Added pictures and videos for missions 1-4
v 1.15 - Added pictures and videos for missions 5-8 + made some minor edits
v 1.20 - Added pictures and videos for missions 9-11 + added some additional pictures and videos for missions 4 and 6 + made some minor edits
v 1.21 - Made some minor edits after a lengthy hiatus based on new info
v 1.30 - Re-wrote large portions of the guide and added lots more videos.
v 1.31 - Made a few minor edits
v 1.35 - Made some additional major edits
v 1.36 - Made a few edits to 'Life' sections
v 1.37 - Made a few edits based on tips in comments
Best Sniper in Call of Duty Black Ops 3
Source: https://steamcommunity.com/sharedfiles/filedetails/?id=556780177